The Complete Vocal Setup for Bedroom Artists in 2026
VP
VocalPresets Team
8 min read
Let's get something straight: you don't need a professional studio to release professional-sounding music in 2026. Artists are charting from bedrooms, closets, and apartments with setups that cost less than a month's rent.
But there's a difference between the bedroom artists who sound like bedroom artists and the ones who sound like they had an engineer. It's not the mic. It's not the room. It's the workflow — knowing how to make vocals sound professional with the tools you already have.
Here's the complete vocal stack for bedroom producers. Everything you actually need, and nothing you don't.
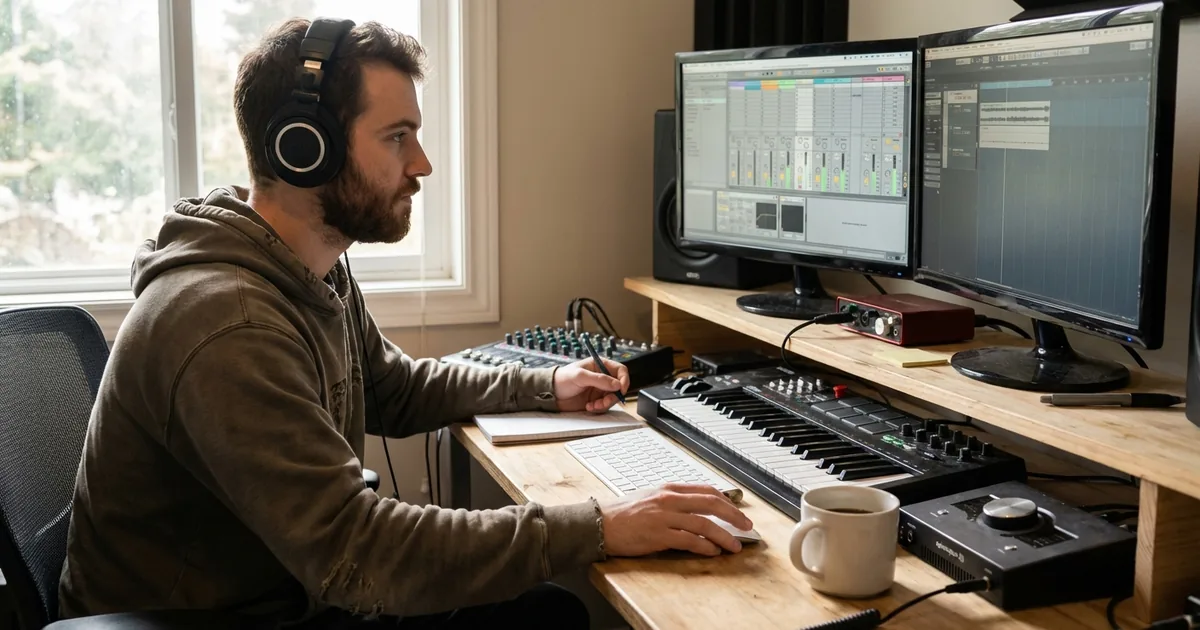
The Gear (Keep It Simple)
You don't need much. Seriously.
- Microphone: A condenser mic in the $100-200 range. The Audio-Technica AT2020 or Focusrite CM25 (often bundled with interfaces) are genuinely good. Your voice matters more than your mic.
- Interface: Focusrite Scarlett Solo or equivalent. $100. It converts your mic signal to digital so your DAW can record it.
- Headphones: Closed-back so the beat doesn't bleed into your mic. Audio-Technica ATH-M50x are the standard, but anything closed-back works.
- DAW: FL Studio, Logic Pro, Ableton, GarageBand — whatever you already have. Don't buy a new DAW just because someone on YouTube said so.
- Your room: A closet with clothes. A corner with blankets hung around the mic. Anything that kills reflections. This matters more than the mic itself.
- Pop filter: $10-15. Stops plosive sounds (hard P and B) from hitting the mic. Non-negotiable at any budget.
Total investment: $200-400 if you're starting from zero. That's it.
Step 1: Pick Your Sound Before You Record
Before you hit record, know what you're going for. Not "good vocals" — that's too vague. What kind of vocals?
A vocal preset defines the sonic character you're building toward — the EQ curve, the compression feel, the reverb space. Loading one before you record changes how you perform. If you hear yourself through a warm R&B chain, you sing differently than through a crispy trap setup. It's like hearing your voice on the radio while you're recording.
Browse vocal presets and find a preset that matches your genre and vibe. Having a target sound before you record means less time guessing afterward.
This step is more important than most artists realize. When you monitor through a preset, you perform with more confidence. You hear yourself sounding polished in real time, which affects your delivery, your energy, and how many takes you need.
Step 2: Record Clean Takes
With your preset loaded for monitoring, focus on the performance. That's your job. You're the artist.
What actually matters when recording:
- Distance from the mic: 6-8 inches for most styles. Too close and your voice gets boomy. Too far and you pick up room noise.
- Gain level: Aim for your peaks hitting around -12 to -6 dBFS. If you see red, turn it down.
- Multiple takes: Do at least 3-4 full takes. The magic take is rarely the first one.
- Don't self-produce while recording. Just perform. You'll pick the best take later.
Vocal Recording Tips That Save Time Later
Warm up your voice first. Five minutes of humming and lip trills before you record means fewer retakes and more consistent tone across your session.
Record a few seconds of silence at the start. This gives you a noise profile you can use later if you need to clean up background sound.
Label your takes immediately. "Verse_Take3_good" is much more useful than "Audio_47" when you're comping at 2am.
Record at 24-bit depth. This gives you more dynamic range and a lower noise floor. Every modern interface supports it. There's no reason to record at 16-bit.
For a deeper dive on recording technique, read our full guide on how to record vocals at home.
Step 3: Clean Up the Raw Recording
Here's where bedroom recordings usually lose the fight against studio recordings. Your room has noise. Your mic picks up things you don't consciously hear — low rumble, subtle reflections, an air conditioner three rooms away.
You can't EQ this stuff out cleanly. That's like trying to un-stir cream from coffee.
VocalEnhancer.com runs your raw vocal through an AI model trained specifically on vocal recordings. Upload the file, download the enhanced version, drop it back in your session. It handles noise, room tone, and micro-artifacts in a single pass.
Do this before applying your preset. You're cleaning the source so the preset has the best possible signal to work with.
Step 4: Apply the Preset and Adjust
Load your vocal preset onto the enhanced vocal. Most of the heavy lifting is done — you're fine-tuning, not rebuilding from scratch.
The adjustments that actually matter:
- Compressor threshold: Every voice is different. You want 4-8 dB of gain reduction on the loudest parts. If you see more than 10 dB, the threshold is too low.
- EQ presence: If your voice isn't cutting through the beat, boost 2-4kHz by 1-2 dB. If it's too harsh, pull that same range down.
- Reverb level: Pull it back slightly from the default. You can always add more; too much makes you sound distant.
- De-esser: Check the 5-8 kHz range. If your S sounds are harsh, nudge the threshold down. If you're losing brightness, back it off.
That's it. Don't touch every knob. The preset was designed by someone who knows what they're doing — trust the starting point and only fix what sounds off on your voice.
What If the Preset Doesn't Sound Right?
If a preset sounds off on your voice, the issue is usually one of these:
- Your recording level is too different from what the preset expects. Normalize your vocal to peak around -3 to -6 dB before the chain.
- Your voice has a different tonal character. Adjust the EQ — cut where your voice is building up, boost where it needs energy.
- The genre doesn't match. An R&B preset on a trap vocal (or vice versa) will sound wrong no matter how you tweak it. Start with the right genre category.
Step 5: AI Vocal Transformation (Optional but Powerful)
This step is for when you want to go further than your natural voice can take you on its own.
VocalPresets.ai takes your clean, processed vocal and transforms it — different vocal character, different texture — while keeping your performance intact. Your timing, your emotion, your delivery all stay. The voice itself changes.
Where this actually shines for artists:
- Harmonies: Create a backing vocal that sounds like a real second singer, not an obvious double
- Ad-libs and doubles: Get a vocal double that sits differently in the stereo field
- Creative exploration: Try your song with a completely different vocal texture without re-recording
- Hook variation: Same melody, different character for the hook vs. verse
This isn't replacing you. It's expanding what you can do with a single recording session.
The Full Setup, Summarized
| What | Tool | Why |
|---|---|---|
| 1. Your sound | Browse vocal presets | Pick a target sound before you record |
| 2. Your performance | Your mic + DAW | Capture the best take you can |
| 3. Cleanup | VocalEnhancer.com | Remove room noise and artifacts |
| 4. Your mix | Your preset chain | Make it sound release-ready |
| 5. Creative expansion | VocalPresets.ai | Harmonies, doubles, new textures |
Most artists recording at home are only doing step 2 and maybe step 4. The ones getting DMs asking "where did you record this?" are doing all five.
Why This Order Matters
Each step feeds the next. A clean recording makes the enhancement more effective. An enhanced file makes the preset sound more accurate. A well-mixed vocal makes AI transformation more convincing.
Flip the order and you're stacking problems on top of problems. This is the same principle behind vocal chain order — every stage depends on the one before it.
Troubleshooting Your Bedroom Vocal Stack
My vocals sound thin compared to professional releases. You're probably missing low-mid body. Check if your high-pass filter is cutting too aggressively (try lowering it to 80Hz). Also, subtle saturation adds perceived fullness without actually boosting volume.
The beat sounds professional but my vocal sits on top like it doesn't belong. This is a level and reverb issue. Your vocal needs to share the same "space" as the beat. Add reverb via a send (not directly on the vocal), and make sure your vocal level matches the energy of the instrumental.
I can hear my room in the recording. Treat what you can with blankets and closet recording. For what's already recorded, noise removal tools help, but prevention is always better than correction.
My mixes sound good in headphones but bad on speakers. Check your mix on at least three systems — headphones, phone speaker, and car or bluetooth speaker. If the vocal disappears on small speakers, it needs more presence (2-5kHz boost).
Frequently Asked Questions
How long does it take to go from raw recording to release-ready vocal? With a preset loaded and your workflow dialed in, about 15-30 minutes per song. The first time takes longer because you're learning. By your fifth song, the process becomes automatic.
Do I need to learn mixing to release music? Not in the traditional sense. You need to understand basics — what EQ does, what compression does, how reverb works. But a good vocal preset handles 80% of the mixing decisions. Learn enough to make small adjustments, and you can release music that sounds professional.
Should I pay for mixing or do it myself? Start by doing it yourself. You'll learn faster, release more music, and keep more money. If you land a song that's gaining traction and you want it polished by a pro, that's a good time to invest in professional mixing. Don't wait for perfect mixes before releasing anything.
What's the single most impactful upgrade for my vocal sound? Acoustic treatment. A $30 pack of moving blankets hung around your recording spot makes a bigger difference than any plugin, preset, or mic upgrade. After that, a solid vocal preset is the next biggest jump in quality.
The Real Talk
You don't need permission from a studio or an engineer to release music that sounds professional. The tools exist. The presets exist. The workflow is five steps.
The only thing between you and a release-ready vocal is actually doing it. Stop tweaking. Stop watching tutorials. Record, process, and put it out.
Start at step 1: Browse vocal presets by DAW and genre | Try it free: Free vocal presets
Related: How to Build a Vocal Chain | How to Record Vocals at Home | Best Vocal Chain Plugins